
How to Fix a Leaking Pipe Without Professional Help
When you notice a leaking pipe, it can feel overwhelming, but addressing it yourself is often manageable. Start by pinpointing the leak's source and shutting off the water supply to prevent further damage. Once you've drained the pipes and cleaned the area, you'll need a few vital tools and materials to make a temporary fix. Understanding how to apply these fixes effectively can save you both time and money, but knowing the right steps to take next is essential to guarantee your repair holds. So, what's the best way to proceed?
Identifying the leak source is essential to effectively addressing a plumbing issue. Start by examining areas where water stains or dampness appear, as these often indicate leaks behind walls or under floors.
Utilize leak detection methods such as visual inspections and listening for dripping sounds. Pay close attention to joints and connections, as these areas are common leak points.
Next, monitor your water pressure. A sudden drop in water pressure may signal a hidden leak. If you suspect a leak, turn off all water-consuming appliances and check your water meter. If it continues to run, you likely have a leak somewhere in your plumbing system.
For more precise detection, consider using specialized tools like moisture meters or infrared cameras. These tools help you pinpoint the exact location of the leak without invasive measures.
Once you've localized the leak source, you can plan your repair strategy effectively. Remember, addressing the root cause of the leak promptly will prevent further damage and save you money in the long run.
Stay methodical in your approach, and you'll guarantee a successful resolution to your plumbing issue.
Before you start repairing the leak, you'll need to gather the right tools and materials. This includes essential tools, safety equipment, and a checklist of repair materials to guarantee a smooth process.
Having everything on hand will save you time and prevent further complications. Additionally, understanding the common signs of water leaks, such as unexplained spikes in your water bills or damp spots on walls, can help you identify the issue more effectively.
For more information on detecting leaks, you can refer to common signs of water and gas leaks.
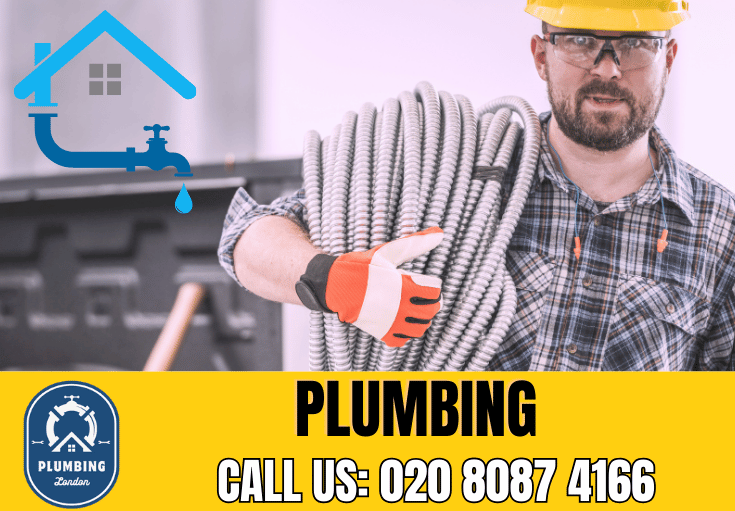
To successfully tackle a leaking pipe, gathering the right tools is vital. The specific tools you'll need can depend on the pipe types involved and the potential leak causes.
Start with a pipe wrench, which provides a strong grip on various pipe sizes. A pair of adjustable pliers is also important for tightening or loosening fittings.
Next, you'll need a hacksaw or pipe cutter for cutting pipes if necessary. For sealing leaks, plumber's tape or pipe joint compound is invaluable. If the leak is due to corrosion or a small hole, consider using a repair clamp or epoxy putty for a temporary fix.
Don't forget a bucket or towel to catch any water that drips during your repair work.
For more extensive repairs, having replacement parts, such as connectors or new sections of pipe, can save you time. A measuring tape is also vital for accurately sizing new materials.
Gathering the right tools goes hand-in-hand with ensuring your safety while fixing a leaking pipe. Before you begin, it's essential to equip yourself with the necessary protective gear.
Start with safety goggles to shield your eyes from debris and potential splashes of water or chemicals. These are vital, especially in tight spaces where visibility can be limited.
Next, wear gloves made of durable material, like rubber or latex, to protect your hands from sharp edges, chemicals, or hot surfaces. Depending on the job, knee pads may also be beneficial if you'll be working on the floor for an extended period.
Consider using a hard hat if you're working in an area where there's a risk of falling objects, such as in a basement or attic.
Ear protection is another option if you're using power tools that generate excessive noise.
Having the right materials on hand is essential for effectively repairing a leaking pipe. To tackle this DIY solution successfully, gather the following repair materials before you start.
First, make sure you have a pipe wrench or adjustable pliers for securing and loosening the pipe fittings. Next, grab some plumber's tape or Teflon tape, which helps seal threaded connections and prevent future leaks.
You'll also need pipe sealant or epoxy putty to fill small cracks or holes in the pipe. If the leak is more significant, consider using a pipe repair clamp or rubber patch as a temporary fix.
Don't forget about a bucket or towel to catch any water and minimize mess during your repair. Additionally, keep a utility knife handy for cutting any damaged sections of the pipe or fittings.
A measuring tape is useful for accurate measurements if you need to replace any sections of pipe. Finally, have some safety goggles and gloves on standby to protect yourself while working.
To fix a leaking pipe, you first need to shut off the water supply. This step is critical to prevent further water damage and allows you to work safely.
Locate the main valve in your home and turn it off, then guarantee all appliances that use water are also turned off to prevent further issues.
If you're unsure about how to handle plumbing emergencies, consider the importance of having emergency plumbing services available for urgent situations.
Before you can address a leaking pipe, it's vital to locate the main valve to shut off the water supply effectively. The main valve is typically found near where the water line enters your home, often in the basement, crawl space, or on an exterior wall.
Identifying the right valve type is significant; common valve types include gate valves and ball valves. Gate valves usually have a round wheel for operation, while ball valves have a lever handle.
Once you've identified the likely valve locations, approach the valve carefully. Confirm the area is clear of any obstructions, as you may need access to operate it smoothly.
Turn the valve clockwise to shut off the water supply. If you encounter resistance, don't force it; instead, double-check that you're turning the correct valve type.
In some homes, there might be additional shut-off valves for specific areas like the bathroom or kitchen. While these can help, always start with the main valve to avoid further complications.
After shutting off the water, you can safely proceed to repair the leaking pipe without risking additional water damage.
Turning off appliances is an essential step in managing a leaking pipe, as it helps prevent further water damage and potential hazards. First, locate the main shut-off valve for your water supply and turn it off to stop the flow of water. This action safeguards your appliances from sustaining damage due to excess moisture, which can lead to costly repairs and compromise energy efficiency.
Next, turn off any affected appliances, such as washing machines, dishwashers, or refrigerators with water dispensers. By doing this, you minimize the risk of electrical hazards and enhance overall appliance maintenance.
If your appliances have a dedicated water supply line, verify that these lines are also shut off. This precaution helps isolate the issue and prevents further leakage while you assess the situation.
Draining the remaining water from your pipes is essential to mitigating damage and facilitating repairs after a leak. Start by shutting off the main water supply valve, typically located near your water meter or where the main line enters your home. This prevents additional water from flowing into the pipes while you work.
Next, use various water drainage methods to remove any residual water. Open all faucets in your home, starting from the highest level and working your way down. This allows gravity to help drain the remaining water in the pipes. Don't forget to flush toilets to empty the tanks.
For pipes with longer runs or where water seems trapped, consider using a wet/dry vacuum to suck out any remaining water. As you drain the water, keep an eye on the condition of your pipes. This is a good time to apply pipe maintenance tips, such as checking for corrosion or signs of wear.
Once the water is fully drained, you'll be in a much better position to assess the leak and proceed with your repairs effectively.
To effectively address a leaking pipe, it's important to clean the affected area thoroughly. Begin by gathering your cleaning supplies, including rags, a bucket, and a mild detergent. Use a towel to soak up any residual water, guaranteeing the area is as dry as possible. This is vital for proper surface preparation.
Additionally, consider the importance of specialized systems that can help prevent leaks in commercial plumbing settings.
Next, apply appropriate cleaning techniques to remove any grime, dirt, or corrosion around the leak. A mixture of warm water and detergent works well for general cleaning; scrub the area gently with a cloth or sponge. If you notice mineral buildup or rust, consider using a wire brush or abrasive pad, but be careful not to damage the pipe's surface.
Once cleaned, inspect the area carefully for any additional damage that might be contributing to the leak. Verify the surface is smooth and free of debris, as this will enhance the effectiveness of any temporary fixes you plan to apply later.
After ensuring the area around the leak is clean and dry, it's time to implement temporary fixes that can help mitigate the problem until a permanent solution is available.
These emergency measures can provide quick solutions to prevent further damage while you plan for a more lasting repair. It's essential to address any leaks promptly, as they can lead to more significant issues such as mold growth or structural damage.
For more complex plumbing issues, consider reaching out to professionals for emergency boiler repairs.
Here are four effective temporary fixes you can apply:
Duct Tape: Wrap a few layers of duct tape tightly around the leak. This can hold back minor leaks for a short period.
Rubber Patch: Cut a piece of rubber from an old hose or tire, then place it over the leak and secure it with clamps or duct tape. This method offers added durability.
Plastic Bag: For a leaky pipe, you can wrap a plastic bag around the area, then seal it tightly with duct tape. This will help catch any water temporarily.
Epoxy Putty: Mix the epoxy according to package instructions and apply it directly over the leak. This creates a strong bond and can withstand water pressure.
Implementing these fixes will buy you time while you seek a permanent solution.
Applying plumbing tape can effectively seal leaks in pipes, providing a reliable temporary solution. When selecting plumbing tape types, you'll find options like Teflon tape and silicone tape, each suited for different applications. Teflon tape is ideal for threaded connections, while silicone tape works well for wrapping around leaks.
To properly apply plumbing tape, start by cleaning the pipe surface to guarantee maximum adhesion. For Teflon tape, wrap it around the threaded area in a clockwise direction, overlapping each layer slightly. Aim for three to five wraps, depending on the size of the threads. Make sure the tape is snug but not too tight, as it needs to compress when you tighten the connection.
If you're using silicone tape, stretch it as you wrap it around the leak, ensuring you cover the area completely. Overlap each layer by about half for a tight seal. Once you've finished wrapping, press the tape down to activate its adhesive properties.
This method will create a water-resistant barrier that can hold until you're ready to make a permanent repair. Remember, plumbing tape offers a temporary fix and shouldn't replace proper repairs when possible.
Replacing damaged sections of a pipe is essential for guaranteeing a long-term solution to leaks. When you identify a compromised area, the right approach can save you from future headaches.
Here's how to effectively replace those sections using various pipe types and repair techniques:
Assess the Damage: Inspect the pipe carefully to determine the extent of the damage. Visible cracks or corrosion often require replacement.
Select the Right Materials: Choose the appropriate pipe type, whether it's PVC, copper, or PEX, to match your existing plumbing.
Cut Out the Damaged Section: Use a pipe cutter to remove the damaged segment. Guarantee clean, straight cuts for a proper fit.
Install the New Section: Connect the new piece using the appropriate repair techniques, such as solvent welding for PVC or soldering for copper.
Following these steps guarantees a secure fit, minimizes the risk of leaks, and enhances the overall integrity of your plumbing system.
Once you've replaced damaged sections of your pipe, it's vital to test for leaks to guarantee your repair is effective. Start by conducting a pressure test. This involves sealing off the repaired section and introducing water or air into the pipe. Monitor the pressure gauge for any drops, which could indicate a leak.
For water testing, fill the pipe with water and apply a pressure gauge at a designated point. If the gauge shows a steady reading over a period, your repair is likely secure. If not, you need to investigate further for potential leak detection.
For air testing, use an air compressor to pressurize the pipe. Listen carefully for hissing sounds, which can signal escaping air at the repair site.
After your pressure testing, it's important to inspect all joints and seams visually. Look for any signs of moisture or corrosion that may suggest a leak. If you find any issues, you may need to re-evaluate your repair.
You can use duct tape for a temporary pipe fix, but its effectiveness varies.
While it can seal small leaks, it's not a long-term solution. Duct tape may hold for a short period, but water pressure and temperature changes can weaken it quickly.
For a reliable fix, consider using plumbing tape or epoxy putty, which provide more durability.
Always aim for permanent solutions to prevent further damage and costly repairs down the line.
You should only rely on temporary solutions for a short period.
Ideally, a temporary fix can hold for a few hours to a couple of days, depending on the leak's duration and pressure.
However, it's vital to monitor the situation closely. If the leak worsens or if you notice water damage, you need to address it immediately.
Ultimately, aim for a permanent repair as soon as possible to avoid further issues.
Common causes of pipe leaks include pipe corrosion, which deteriorates the material over time.
Joint failure often occurs due to improper installation or excessive pressure.
Temperature changes can lead to expansion and contraction, causing cracks.
High water pressure can stress pipes, especially old ones, leading to leaks.
Additionally, frozen pipes may burst when thawed, and general wear damage can weaken the structural integrity, resulting in leaks that require your attention.
You'll know it's time to call a plumber if your pipe inspection reveals persistent leaks, water stains, or mold growth.
If you can't identify the source of the problem or if leak detection methods fail, don't hesitate to reach out for professional assistance.
Additionally, if you notice a significant drop in water pressure, unusual sounds, or increased water bills, these signs indicate that a plumber's expertise is necessary for a proper resolution.
If you're looking for DIY alternatives to plumbing tape, consider using plumbing putty or silicone sealant.
Plumbing putty creates a watertight seal and works well for drain connections or faucets. Silicone sealant, on the other hand, is flexible and can seal gaps in various plumbing applications.
Both options are easy to apply and can effectively prevent leaks. Just make sure the surfaces are clean and dry before applying either product for the best results.
Fixing a leaking pipe on your own is entirely doable with the right approach. By identifying the leak source, gathering necessary tools, and shutting off the water supply, you set the stage for an effective repair. After cleaning the area and applying temporary fixes, don't forget to test for leaks once you've replaced any damaged sections. With patience and attention to detail, you can successfully manage minor plumbing issues without needing professional assistance.
Our Services: General plumbing repairs, Boiler Installations, Boiler Repair, Boiler servicing, Central heating installation, Central heating repair, Radiator installation, Radiator repair, Underfloor heating installation, Underfloor heating repair, Water heater installation, Water heater repair, Leak detection and repair, Pipe repair and replacement, Emergency plumbing services, Drain cleaning and unblocking, Toilet installation and repair, Sink installation and repair, Shower installation and repair, Bath installation and repair, Tap installation and repair, Kitchen plumbing installation, Bathroom plumbing installation, Gas appliance installation, Gas safety checks, Gas leak detection and repair, Thermostat installation and repair, Power flushing, Pump installation and repair, Hot water cylinder installation, Hot water cylinder repair, Immersion heater installation, Immersion heater repair, Sump pump installation and repair, Water softener installation, Water filtration system installation, Backflow prevention installation, Commercial plumbing services, Residential plumbing services, Heating system maintenance, Plumbing system maintenance, Water pressure testing, Waste disposal unit installation and repair, Gutter cleaning and repair, Soil stack installation and repair, Septic tank installation and repair, Water main installation and repair, Pipe insulation, Plumbing inspections, Eco-friendly heating solutions installation